Estimated reading time: 4 minutes
One of the chief complaints about crocheted garments is that they are not stretchy nor can they be fitted. If you have looked at any sort of social media post discussing crocheted clothing, I am certain you have seen this sort of comment, among many other discouraging comments about crocheted clothing.
Here’s the thing: It is harder to make stretchy garments with good drape out of only single and double crochets without having a big hook and a smaller yarn. You have to use stitch patterns with chains and spaces that create openings and gaps in the fabric, something all single or double crochets just don’t do. Those gaps create drape because openings offer little resistance whether in crochet stitches, time, or space.
Since stitch patterns that combine several types of stitches and chains have more open spaces, they have more stretch, more drape, more interest, and create a way better garment, so I like to use them when I make sweaters. Even something as simple as the single crochet v stitch I use in this sweater is enough to lend stretch, drape, and interest. This is the key to creating crochet garments that do not look like typical stiff crocheted garments.
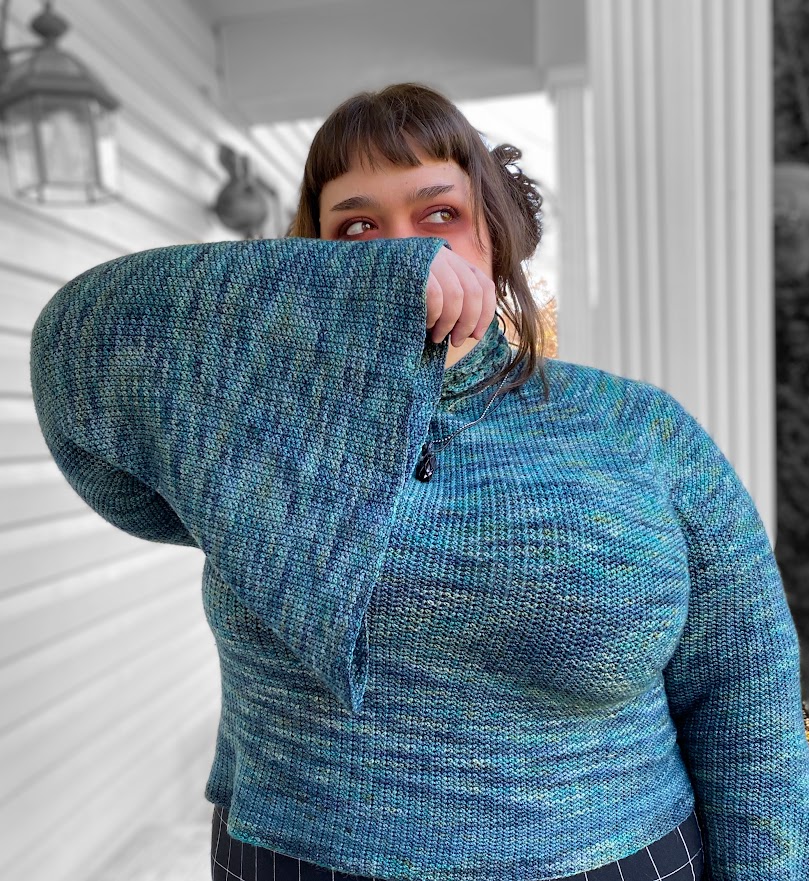
Adia asked me to make her a lightly fitted mock turtleneck and she bought me the yarn to make it (8 hanks of Malabrigo sock). How can I say no? Adia, dear child that she is, takes after her father and has a large noggin, so the mock turtleneck bit of the sweater had to be stretchy or it wouldn’t go over her head while still being snug around her neck. I chose a stitch pattern with open spaces and post stitches because it stretches really nicely. Take that you crochet garment naysayers!
After that I used a single crochet v stitch pattern with a staggered start to create the sweater. This stitch pattern is great because, with a smallish hook and a small yarn, it provides solid coverage and good stretch, so I could create the fitted sweater she wanted without the need for a tank top underneath.
I did sin against the crochet gods and gatekeepers while making this sweater, and I advise you to make your own peace with sinning if you make this sweater. To do the staggered start, I turned my rows as was necessary. When I started working the body of the sweater, I worked in the round with no turning. You can’t see it. Well, maybe YOU could see it, but to the average person who cannot tell crochet from knitting from weaving from felting, it’s fine. I can’t see it, so I refuse to apologize. The crochet gods can smite me if they wish it. And I’m sure they will. They work slowly sometimes, but, far too often, they will come for you, so I’m biding my time.
Let’s talk about the raglan increase. The increase is worked over three rows and ends up giving you two extra v stitches, one for each side of the raglan increase. Pretty, pretty! It gives a really nice compliment to the stitch pattern by adding little diagonal lines running away from the increase point. Having worked with this stitch pattern for a whole sweater now, I want to try another possible way to run the increases that might allow for compound raglan shaping. I’ll just have to make another sweater, oh darn!
I got the raglan increase from Dora Ohrenstein’s book The Crochet Every Way Stitch Dictionary. If you like making sweaters or like a good stitch dictionary, I highly recommend it.
As usual with Adia’s sweaters, the bustline had to be addressed. This is where I employed my secret weapon in fitting: A bigger hook. I was working with a 3.5 mm hook, so I grabbed a 4 mm hook. It’s not that much bigger so the stitch pattern looks pretty much the same, but the rows are a little wider and a little taller, which is all I needed to avoid a bust gusset. To accomplish this, I marked the middle stitch under the arm with a stitch marker. When I reached this marked stitch each round I switched to the 4 mm hook, worked it to the other marked stitch, switched back to the 3.5 mm hook, and used it to work the back of the sweater. I normally do this until either I am past the bust area OR the front of the sweater looks like it is going to be longer than the back of the sweater, then I go back to just using the 3.5 mm hook for the whole thing.
It is really important with this stitch pattern to maintain the flow of the vertical lines. If they wobble, it will be very noticeable. I could have worked a gusset into the bust line, but the lines would be very clear and would almost make a little umbrella over the bust. I really did not want that. As it is, the lines go straight over the bust without stretching, so it looks fitted without looking tight. I win!
For the hem, I worked a single crochet into each chain 2 space in the v stitches from the row below and worked 2 chains between each single. It gives a smooth edge to the bottom of the sweater without looking bulky or detracting from the overall linear look of the sweater. I tried putting the neck design on as a hem, but it looked terrible, as did a row of single crochets. Frogged them both.
The sleeves were another question altogether. I marked the v stitch at the middle of the elbow, changed to a 4.25 mm hook (after frogging twice with 3.5 and 4 mm hooks), and started making increases just there to create a flared sleeve. I worked the increases to her wrist and finished the sleeve with the single crochet, chain 2 pattern I used for the bottom of the sweater hem.
I included my notes and diagrams with this post, if you want to try this sweater for yourself. Of course, your shaping will be different, but I have laid out the increases and decreases so you can use those as you like to create your own perfect sweater. Drop a picture in the comments if you try it or if you have a question!


Leave a comment